For any support please don't hesitate to contact us at Support Center. We provide 8 hours real-time support for our customers.
We would like to thank you for choosing Yoga - Fitness WordPress Theme.
Getting started
You need at least WordPress version 1.0.0 installed for this theme to work properly. It is strongly recommended that you always use the latest stable version of Wordpress to ensure all known bugs and security issues are fixed. Other getting_started:
PHP version 5.6 or greater. But for maximum speed gain we recommend you to use PHP version 7.4+.
MySQL version 5.6 or greater OR MariaDB version 10.0 or greater.
After purchasing Yoga theme with your account, go to your
Download page. You can choose to download Yoga theme only (Installable WordPress
Theme) or the entire Yoga theme package which contains the following files:
The contents of the theme package downloaded from Our Site
gbyoga-premium.zip - An Installable WordPress Theme zip file. this file you need to upload to WordPress.
WordPress Installation
Please follow the instructions in the video to see how you can install WordPress on your
hosting:
Important! if you download the All Files archive from ThemeForest and try to upload it to your WordPress, you will receive this error: Theme is missing the style.css stylesheet. Please make sure you unzipped the main archive and are uploading the correct file to your WordPress.
When you are ready to install a theme, you must first upload the theme files and then
activate the theme itself. The theme files can be uploaded in two ways:
1. Using Theme
Uploader
Follow the steps as instructed in the images below:
From the dashboard go to AppearanceThemesAdd New Upload Theme
Click on “Choose File” and select boxfin.zip
Click on “Install Now”.
Active the Theme
N.B: All plugins must be installed and activated if you want your site to look exactly like demo.
Appearance → Themes → Add New Click on “Choose File” and select boxfin.zip and Click on “Install Now”.Active Yoga Theme
2. Using FTP Clients
Follow the following steps to upload your theme using FTP clients:
Use an FTP such as FileZilla and go to your WordPress installation director
Navigate to /wp-content/themes/ folder and upload the theme folder there
Log in to your WP Admin Dashboard and open the AppearanceThemes menu
You will now see Yoga Theme listed among the other themes. Click on Activate and you’re done!
3. Installing required plugins
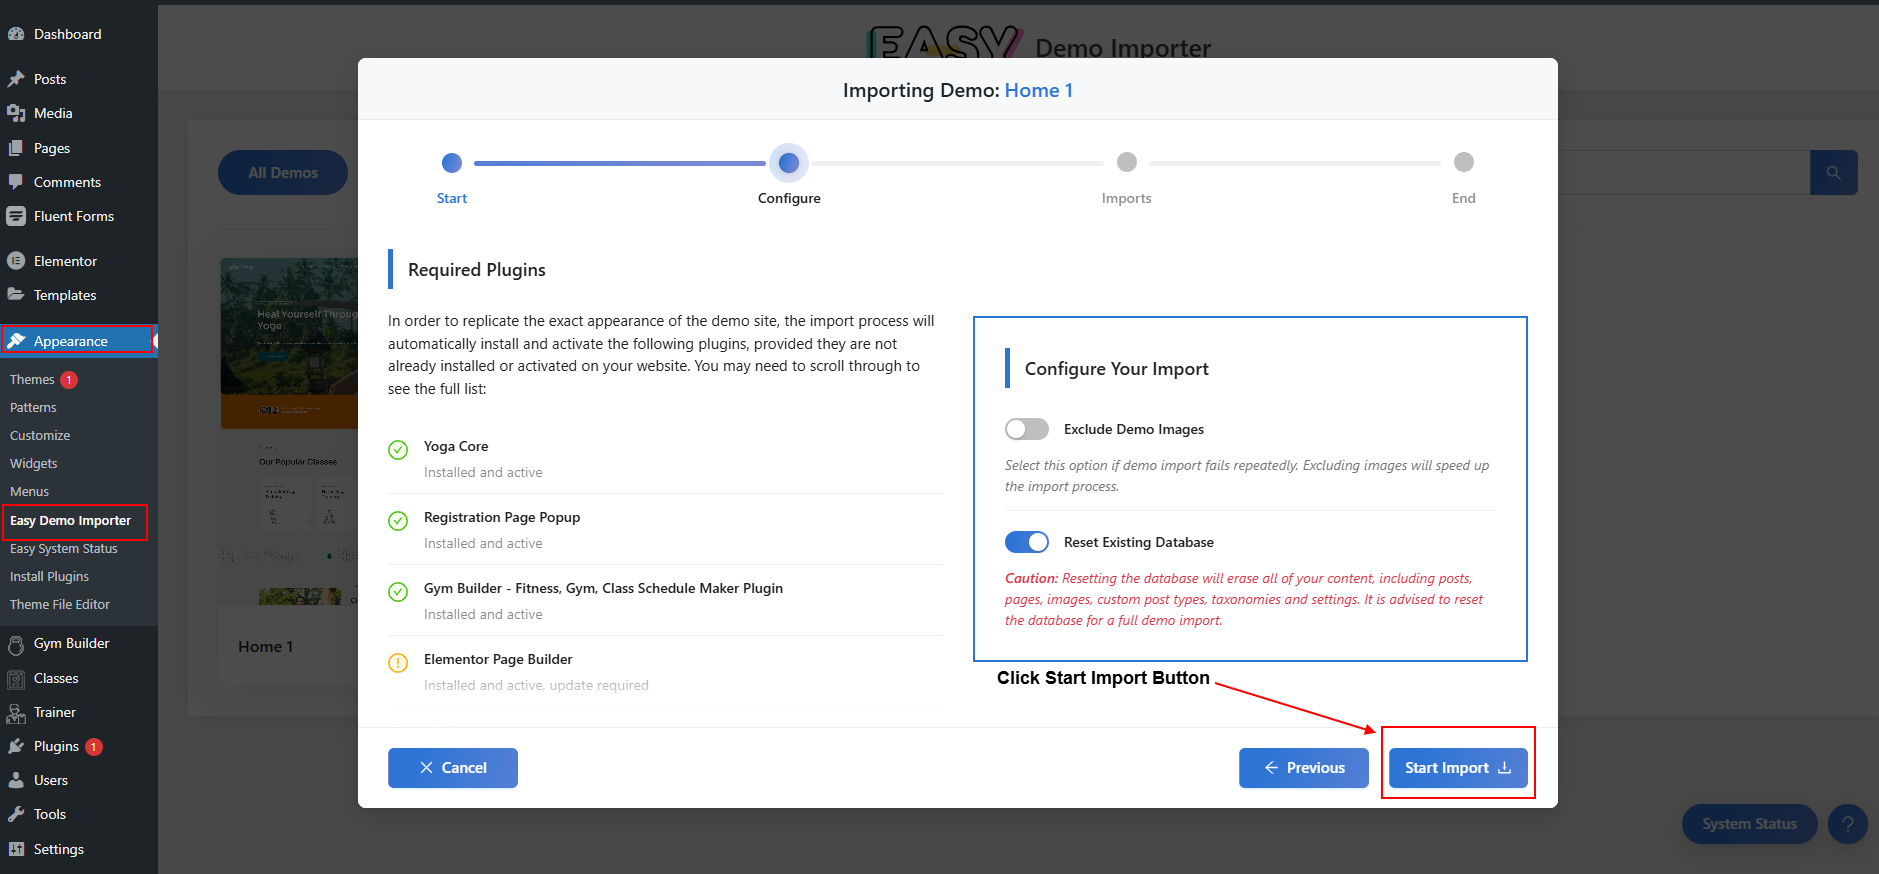
Yoga theme requires a set of core and additional plugins to function correctly. A plugin is an additional component that offers functionality and features beyond a typical WordPress installation. Without them, most of its functionality is not available. After installing the theme you will be prompted to install the required plugins at the top of your dashboard.
From the dashboard go to Appearance Install Plugins
Toggle all the required plugins and hint “Install”;
The last step will be activating the plugins.
Click on the begin installing plugins link to install all the required plugins.Select all and installSelect all and Activate
Importing Demo Contents
We are providing you two methods for importing demo contents: Automatic and Alternative. You can follow either one of these methods.
One Click Method (Recommended): This method will remove all your existing data, so use this method only in fresh website. This procedure will be faster because you just have to do one click and then everything will happen automatically. If you want an exact clone of demo website without doing any manual configuration after importing data then this method is appropiate for you.
Manually Import: Use this method only if:
Automatic demo import method fails ( Only few of our customers like 5% have experienced this issue due to their hosting limits, in that case we also provide free demo importing service if you contact with us).
You already have a working website with existing contents(eg. posts, pages etc).
1. One Click Method
Want to build your site like the demo? You can do it by only one click!
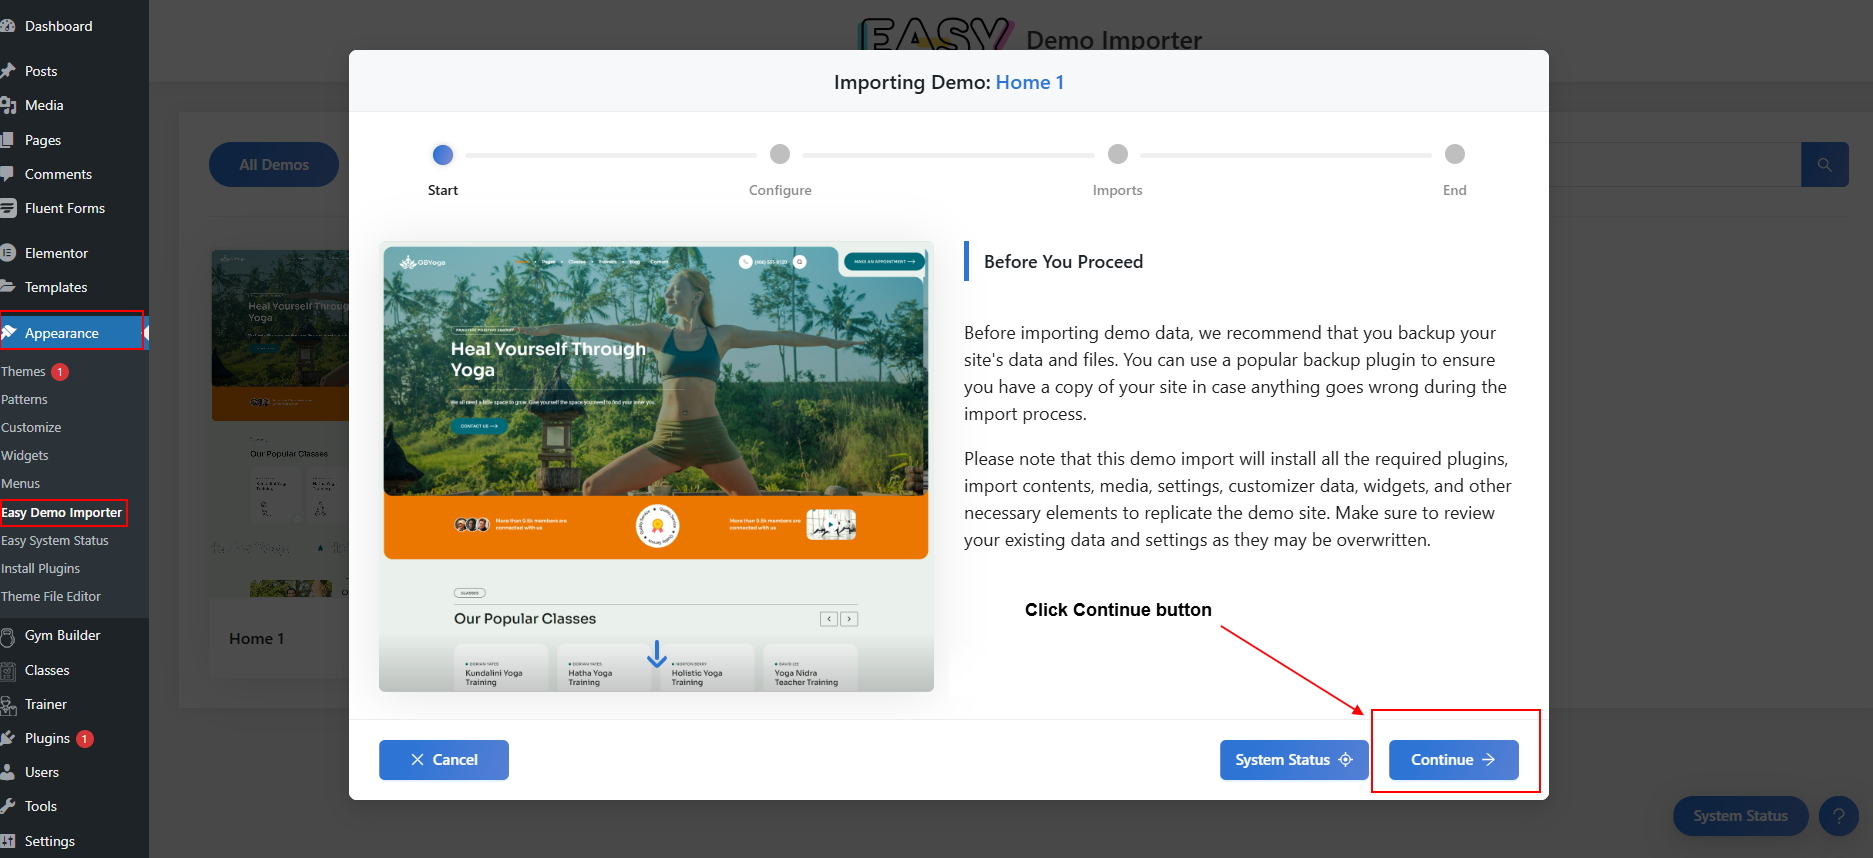
Note: Please remember that when you are done with the demo import, your some existing settings will be replaced by the demo contents Like: Your menu, Customizer. So it is recommended that you should only do this in fresh site.
Ensure, that the One-Click Import plugin is installed and activated;
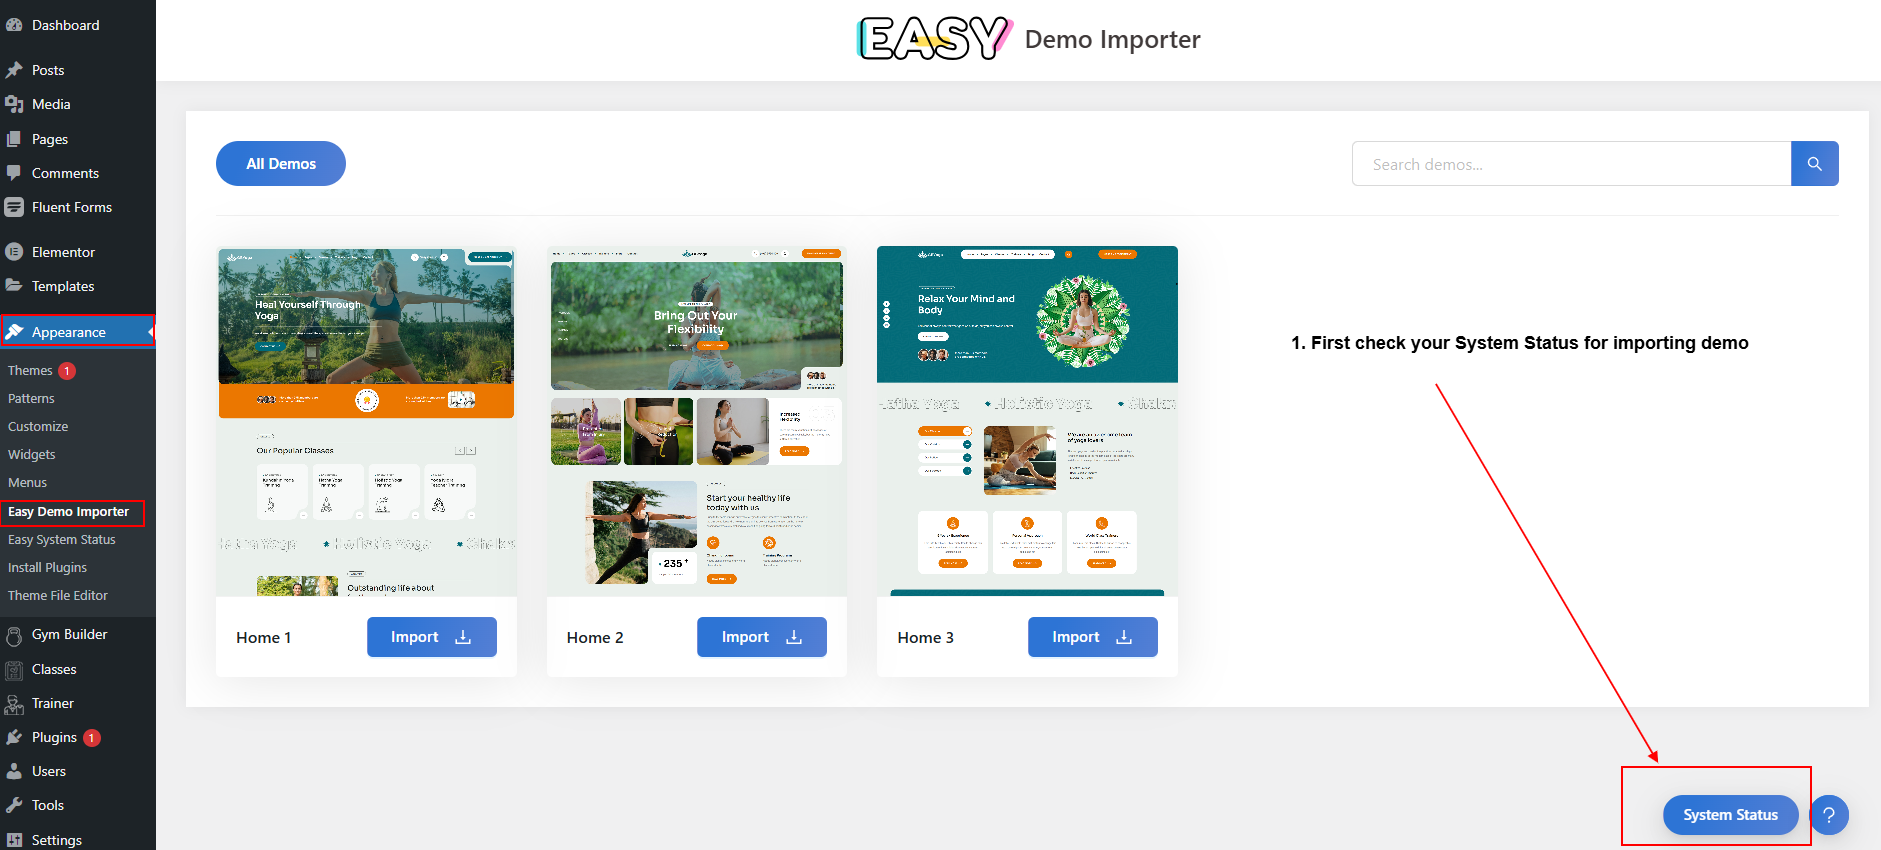
From the dashboard go to Appearance Easy Demo Importer
First check your server system status for importing demo
After fulfill all requirement for importing demo then choose the demo you want to install and click on the “Import” button below;
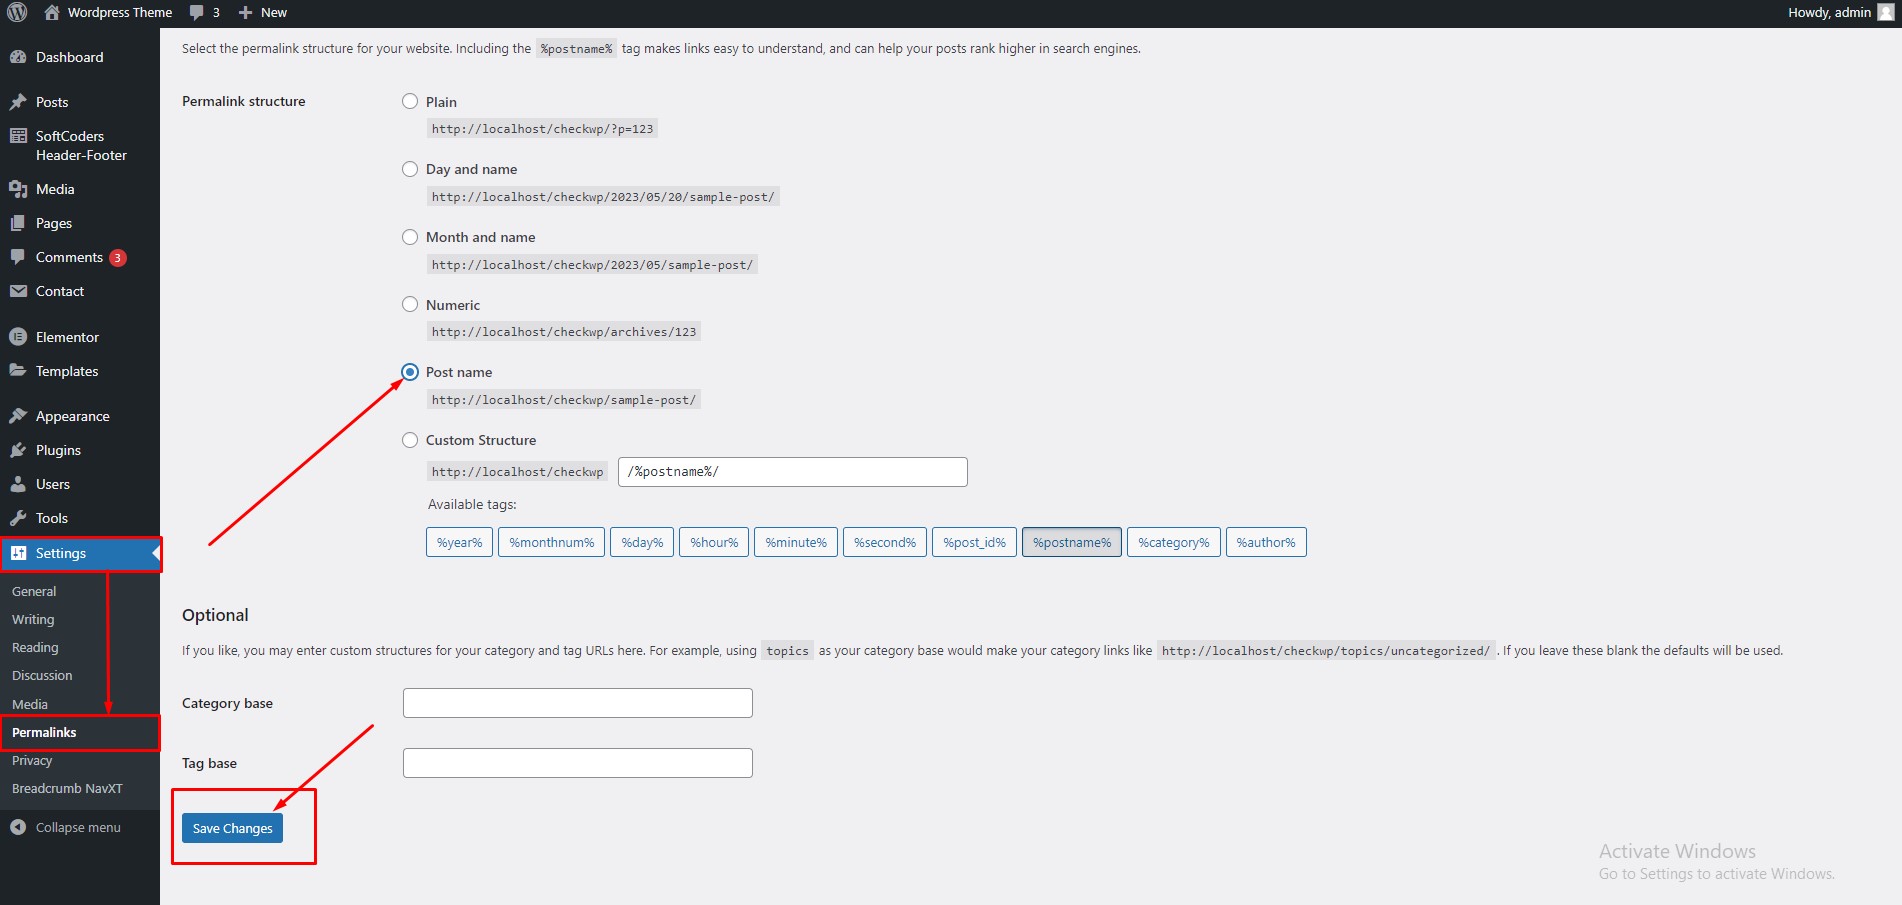
And change the permalink: From the dashboard go to Settings Permalink
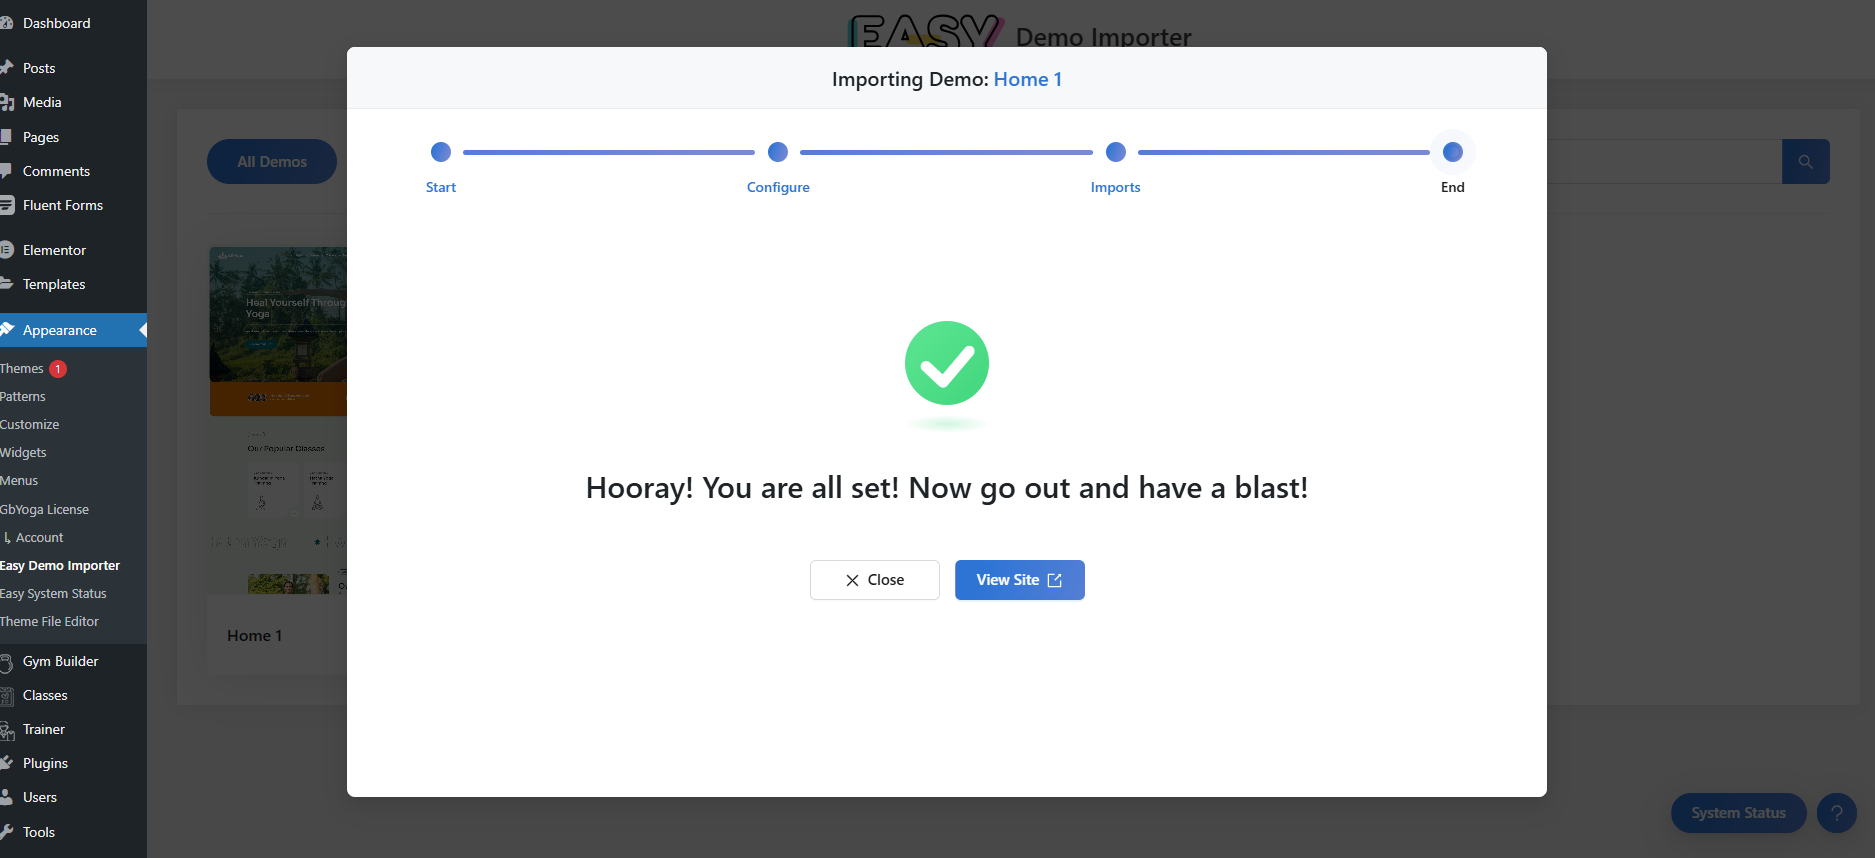
go to Appearance -> Import Demo DataClick on the "Import" buttonClick "Yes, Import" ButtonImport Complete! Congrats, your demo was imported successfully. You can now begin editing your site.Change permalink
Basic Site Setting
Customize Menu
To customize the menu and megamenu please login to wp-admin and navigate to Dashboard AppearanceMenus and follow the following steps:
Change Site Title and Favicon Basic Site Setting
To change your Site title and Favicon login to wp-admin and navigate to Dashboard AppearanceCustomizeSite Identity and follow the following steps:
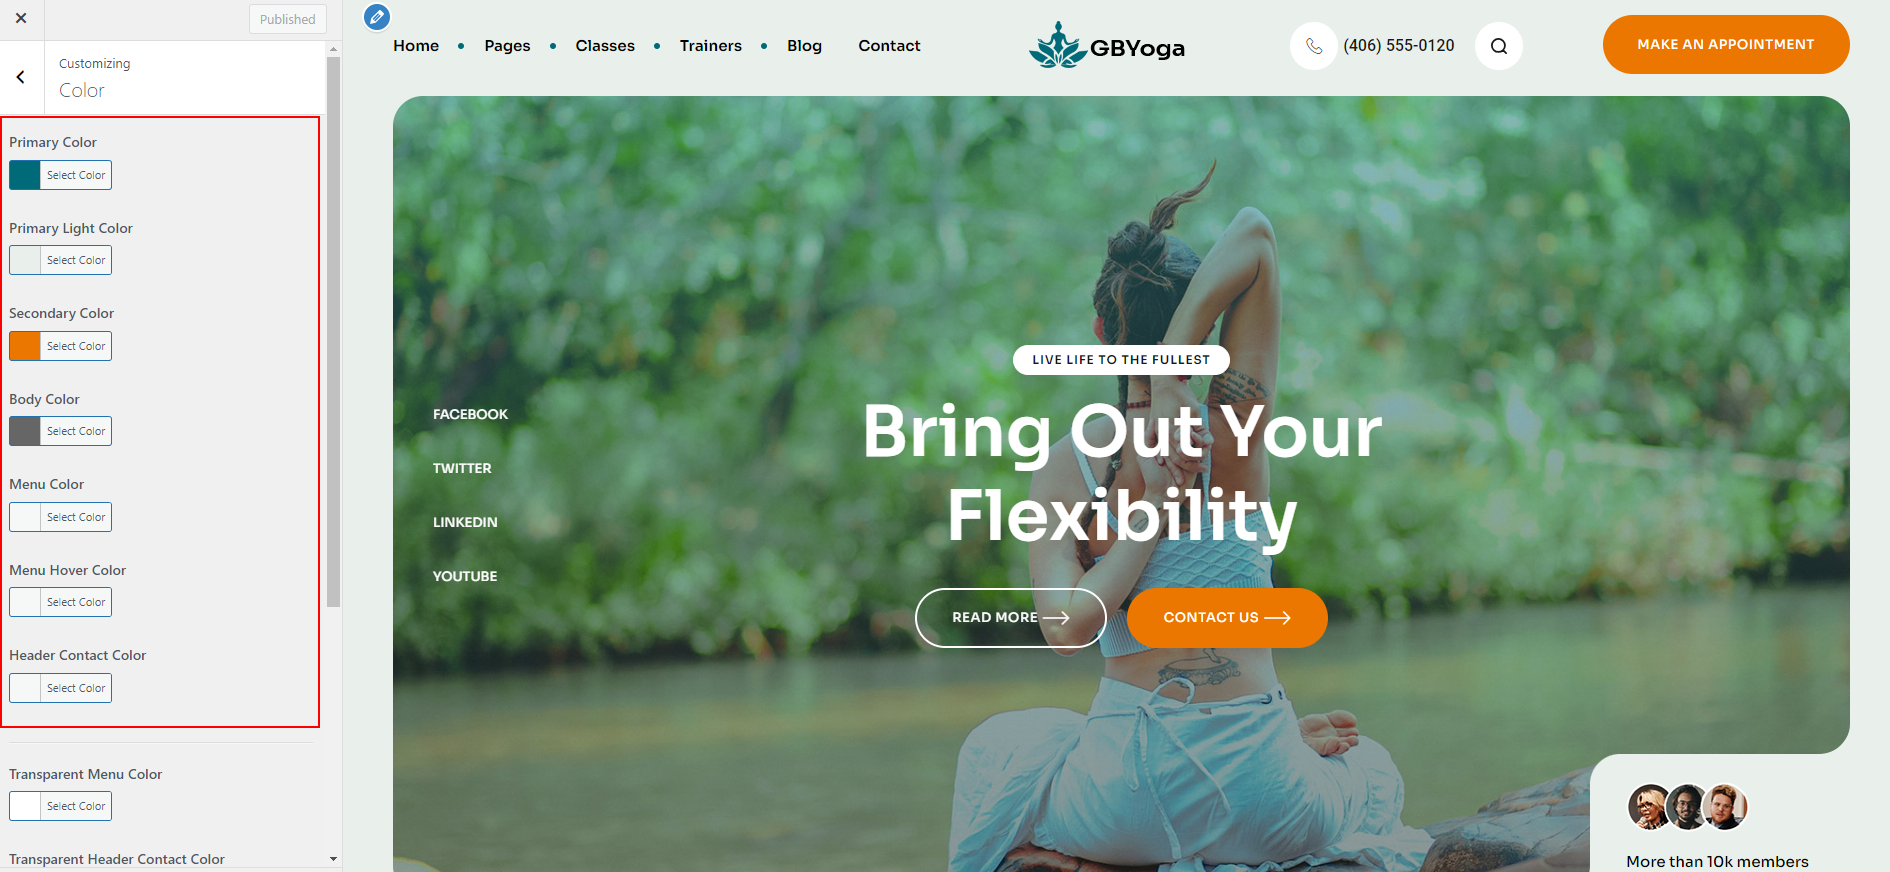
Change Global Colors
To change all global colors login to wp-admin and navigate to
Dashboard AppearanceCustomizeColors Setting
and follow the following steps:
Change Logo
To change the site logo login to your wp-admin and navigate to
Dashboard AppearanceCustomizeGeneral
and follow the following steps:
Change Typography
To change the typography of your site navigate to
Dashboard AppearanceCustomizeTypography
and follow the following steps:
Set Home and Blog Page
To set the home and blog page, login to wp-admin and go to
Dashboard Settings Reading and follow the following steps:
Theme Options
General
To change Theme Options header navigate to
Dashboard AppearanceCustomizerGeneral
and follow the following steps:
Theme Options
Contact & Social
To change Theme Options header navigate to
Dashboard AppearanceCustomizerGeneral
and follow the following steps:
Header / Header layout
To change Theme Options navigate to
Dashboard AppearanceCustomizerHeader
and follow the following steps:
Footer Layout
To change Theme Options navigate to
Dashboard AppearanceCustomizeFooter
and follow the following steps:
Banner
To change Theme Options navigate to
Dashboard AppearanceCustomizeBanner
and follow the following steps:
Layout
To change Theme Options navigate to
Dashboard AppearanceCustomizeLayout
and follow the following steps:
Archive (Blog / Archive Settings)
To change Theme Options navigate to
Dashboard AppearanceCustomizeBlog SettingsBlog Settings
and follow the following steps:
Blog Single Settings
To change Theme Options navigate to
Dashboard AppearanceBlog SettingsPost Settings
and follow the following steps:
Post Share Settings
To change Theme Options navigate to
Dashboard AppearanceBlog SettingsPost Share
and follow the following steps:
Settings (Error Page Settings)
To change Theme Options navigate to
Dashboard AppearanceCustomizeError Page
and follow the following steps:
Elementor Widgets
Elementor Page Builder has a lot of built-in widgets by default. But for your convenience we've created several custom Elementor Widgets that you can use in your website and extend website functionality.
404 Error in all pages
If you face this type of issue, please update your permalink. To update permalink, navigate to Settings -> Permalink and then click on Save Settings button.
17. Contact
If you face any issue please contact us at
Support Ticket